Highlighting
Updated for Logos 10+
Page Contents
The Highlighting tool can be opened from the Tools menu.
It will open in a fixed pane on the left side of the screen by default,
but you can drag it to any location on your screen, just like a resource.
Applying Highlighting
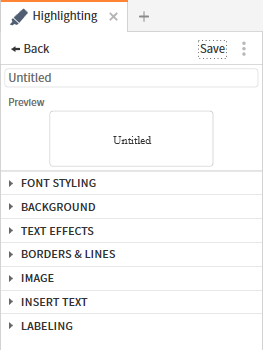
The tool looks like this (you can expand or collapse sections by clicking on their titles).
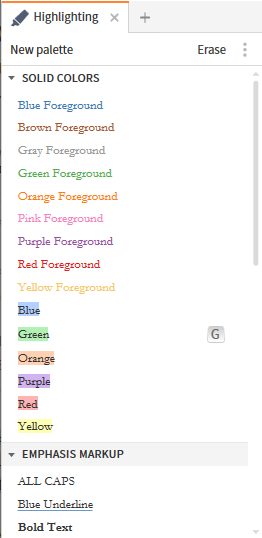
To highlight some text, select the text you want to highlight, and click on a Highlighting style. Pressing Ctrl+K will also apply that style.
You can keep the Highlighting tool open in your layout, and assign keyboard shortcut keys to simplify the process.
Erasing Highlighting
Right click part of the highlighted text, click “Selection” on one side of the Context menu
and then click Delete Notes and Highlights on the other side.
To erase all, or any part, of the highlighting select the required text
and click Erase in the toolbar of the Highlighting panel,
or use the keyboard combination Ctrl+Shift+K (Mac users: Shift+Cmd+K).
If you erase highlighting in the middle of the text you will have two separate highlights.
Shortcut keys
Assigning
- Right click on a highlighter style
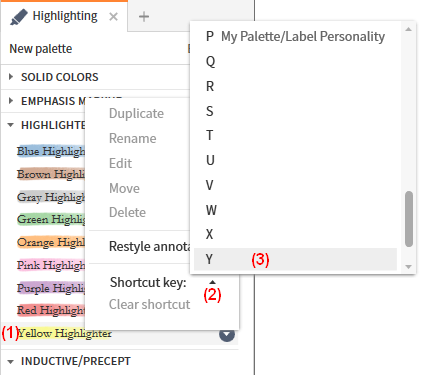
- On the pop-up menu click on the arrow to the right of Shortcut key
- In the new pop-up menu click on the letter that you want to assign to this highlighter shortcut.
- Hit Esc or click somewhere else to dismiss the pop-up menu.
Using
Select the text you want highlighted and press the appropriate shortcut key. (No Shift, Ctrl, Alt combination is needed)
Clearing a Shortcut key
- Right click on the highlight style
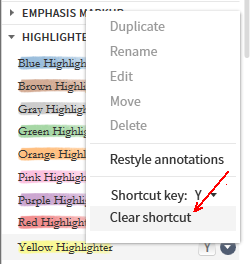
- In the pop-up menu click on Clear shortcut.
Creating Custom Palettes
New Palette
In the Highlighting panel click New palette
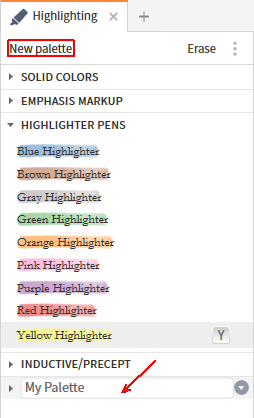
- Give the new palette a name.
Add Styles
Right click on your new palette, or click the down-arrow and select “Add a new style”.
Give the new style a name and then proceed to modify the various attribute sections, and (optionally) associate it with a Label.
The preview area will show you what your style will look like as you enter attributes.
When you have finished click Save in the header.
Font Styling
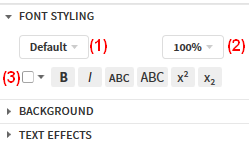
- Select a font name if you don’t want the resource default
- Changes the size of the text
- Changes the color of the text
- The other options are:
- Make the text bold
- Make the text italicized
- Make the text all small caps
- Make the text all caps
- Superscript the text
- Subscript the text
The resource font is changed when the markup is applied.
Background
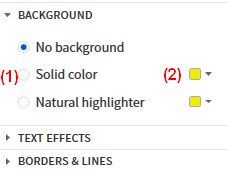
- Choose None, Solid Background, or Natural Highlighter
- Use a colored square to chose the background color or highlighter color.
Text Effects
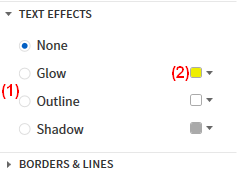
- Choose Glow, Outline, or Shadow
- Use a colored square to chose the color of the effect.
Borders & Lines
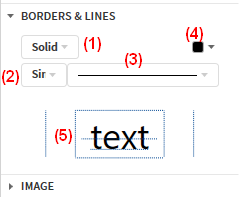
- Selects the type of line to be used i.e. solid, dashed
- Selects the number of lines to be used
- Selects the thickness of the line
- Changes the color of the lines
- Click on the light gray lines to choose where in relationship to the text the line/border is used.
Image
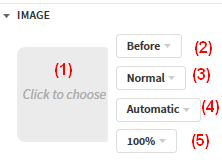
- Click on the gray square to bring up the file navigator.
- Choose the desired image (some are supplied by default).
- Chooses the Horizontal alignment of the image
- Chooses the Vertical alignment of the image
- Chooses the color of the image
- Chooses the size of the image
There is a 4MB file size limit for custom images.
Insert Text

This option allows the insertion of a text label Before/After and Above/Below an applied highlight.
The font selection is identical to the Font Styling section above with the addition of a “Capsule” option, which encases the text in a capsule.
Labeling
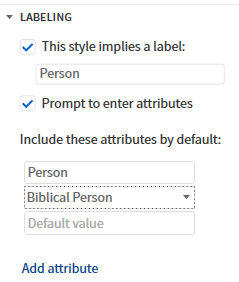
A custom label allows you to categorize the text you are highlighting. See Creating your own Labels.
You can then search for the label and/or its attributes in your resources.
Notes and Highlighting
Which Notes destination?
When you apply a Highlighting style to resource text its details are stored in a Note, and you can choose the destination Notebook in the palette:
- Right click the Palette header, or click the down-arrow on the right
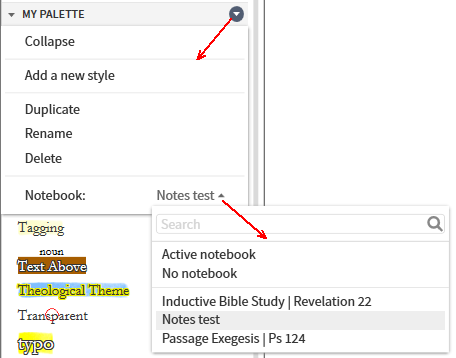
- Click on the name opposite Notebook:
- Choose from:
- Active notebook (default):- active in Notes tool, or the last one used;
- No notebook:- you can assign it to a Notebook from the Notes tool; or
- a list of Notebooks
A change of destination only affects new highlights. This redirection allows you to mix, or separate, notes and highlights.
What is stored?
- The text highlighted and its location
- The style used
- By default, the highlighting will have its Note Indicator/Icon set to None.
- The note content is blank, but you can make a note.
- When you apply compound highlights (a highlighting style applied to already highlighted text),
Logos creates a new note for each style applied.
Manage Highlighting
Restyle Highlighting
If you want to apply a different style to all highlights in a given style, use Restyle annotations:
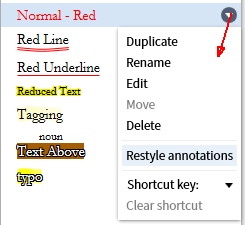
- Right click the Style header, or click the down-arrow on the right
- Click Restyle Annotations
- Select the new style from the drop down menu.
Delete Style
You can remove a style from a palette provided it is not being used:
- Right click the Style header, or click the down-arrow on the right
- Click Delete
- If it is not being used the style is removed.
Otherwise you get a Warning dialog box:
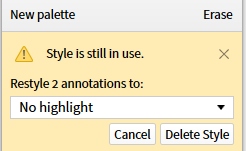
- Permnently delete any highlights that are in the Note tool’s Trash and try again.
- Choose “No highlight” to convert the highlight(s) to a Note, or click the box to select and convert them to another style.
- Click Delete Style after making a selection, else click Cancel.
Undo Highlighting
There is no formal Undo of Highlighting but there is an effective workaround that accomplishes the same purpose.
- Assume you have been working on scripture and adding highlights. Then, by mistake, you have a large area of text selected,
and you inadvertantly highlight in a different color!

- No worries, just right click on any word in the area incorrectly highlighted, as long as the word is not part of any highlighting that you want to retain.
Click “Selection” on one side of the Context menu, and click Delete Notes and Highlights on the other side.
- After that your highlighting is restored to its prior state.
WARNING: DO NOT click on “Erase” in the Highlighting panel.
This will either remove ALL your highlighting styles or just a part of a style(s), depending what you selected.