Passage Analysis
Updated for Logos version 10+
Page Contents
- Passage Analysis tool provides a set of tools to display a variety of graphical analyses of one or more Bible versions.
- There are 5 tools provided in the Passage Analysis. When you open Passage Analysis you will see the 5 tool icons at the bottom of the window. To select one of these tools, click on one of the tool icons.

- Compare Pericopes graphically displays pericope boundaries for multiple Bible versions.
- Word Tree creates a tree structure that displays the context of a word or phrase in which it appears.
- Morph River creates a graphical representation of the grammatical attributes in a Greek or Hebrew morphologically-tagged text.
- Cluster Graph creates a graphical representation of the differences between multiple Bible versions, based on word variance.
- Version River creates a graphical display of the differences between Bible versions on a verse-by-verse basis, using one version as the base to which the others are compared.
- Above descriptions are from: Logos Help Logos Help (2022). Faithlife.
- These tools work with Pericope passage ranges for the Bible(s) that you select.
- At the top of your Passage Analysis tool you will see the reference box. When you enter the passage Jer 18:1-12 a drop down menu will appear showing Pericope verse ranges.
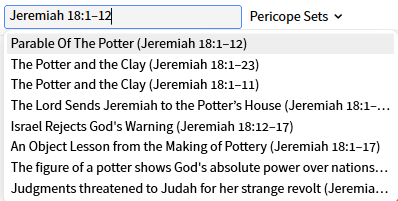
- Pericopes are headings that describe a group of passages in your bible e.g. The Potter and the Clay. They vary from Bible to Bible.
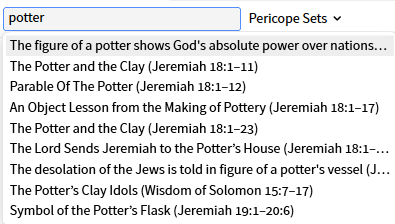
- If you enter potter in the reference box Logos will try to find pericopes which match that word as shown below:
Compare Pericopes
- Compare Pericopes is useful for
- Finding pericope using word(s) that fit the topic in which you want to find. (e.g. typing birth or transfigure)
- Determining which pericope that produces the verse range that you are interested in using with the Passage Analysis tools.
- Seeing how the different Bibles have varying pericopes.
- Click on the Compare Pericopes icon at the bottom of the Passage Analysis tool.
- Click on Pericope Sets.
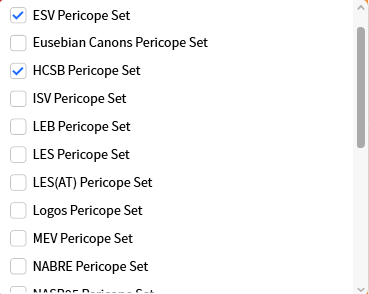
- Check the Bible version(s) that you want to view.
- In the Reference Box enter a Bible reference (e.g. Jeremiah 18:3) or type a word which might be in a pericope.
- Select the passage or pericope that you want to view.
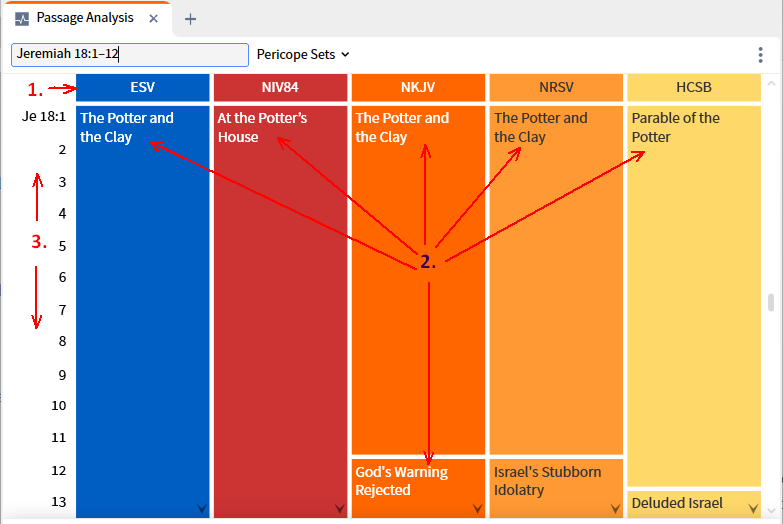
- Now you see a display of the pericope sets that you selected earlier.
The window parts are:
- The Bibles that you selected.
- The different pericopes for each of your Bibles.
- The Bible passages which are scrollable.
- The small up arrow indicates that the pericope starts above the verse you see on the left.
The small down arrow indicates that the end of this pericope is below the last verse shown on the left.
- If you hover the mouse over the pericope title a pop-up box will appear showing you some of the text from you preferred Bible.
- If you click on a pericope title, Logos will open that version and position it to that pericope.
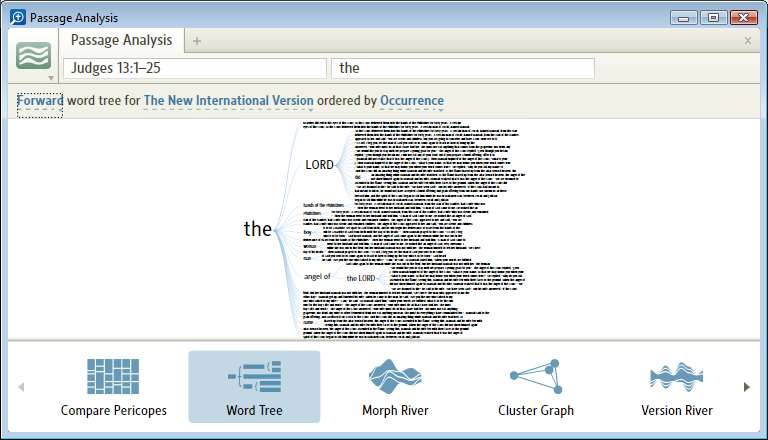
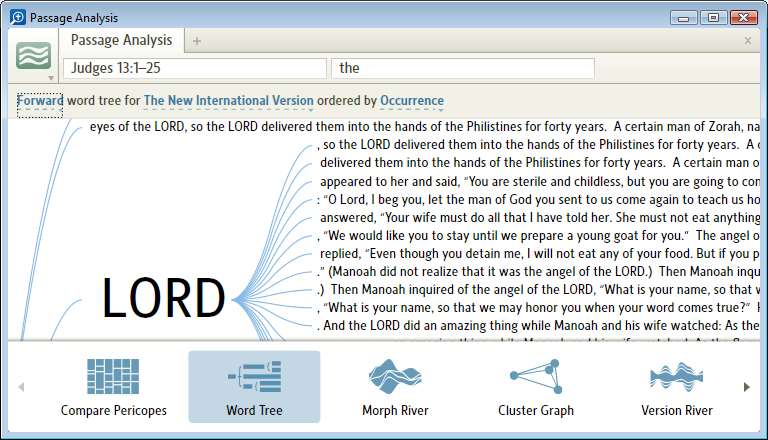
Word Tree
- Word Tree is useful for finding a word or phrase repeated in a Bible passage range.
- The key word or phrases will be shown in different degrees of size. The larger the word/phrase, the more often it was found in your passage.
- Pay attention to text in each text line. You may see repetitions of text, since in the same line of text your key word/phrase was found again. Having a new line of text indicated how many occurrences were found in your passage!
- Below is a description of the parts/usage of the Word Tree:
a) Click on the Word Tree icon at the bottom of the Passage Analysis window to select Word Tree.

b) Change the passage in the Reference Box if necessary.
c) Select the Bible version that you want to use.
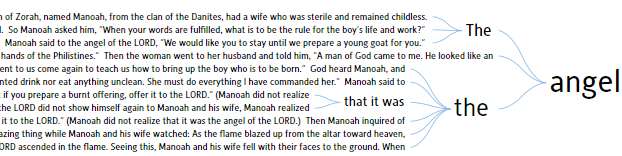
d) The Word Tree will show relevance to a word or phrase that you select e.g. angel. You can select the key word by typing it in the Word box or by clicking on a word in the text in the Word Tree.
If you click on a word in the text, you will see it appear in the Word box. Sometimes when clicking on a word it may show only a few words in a single line, but you can type a word in the Word box to get back to viewing more text lines (type the in the word box to show most if not all the lines).
e) When you see a group of words enlarged, the Word Tree is indicating this is a phrase. You can click on the phrase to have Word Tree set the phrase as the key word.
f) The ordering of the text lines can be adjusted here. Click to get a drop down menu from where you can select Occurrence, Alphabetical or Frequency.
g) The direction of the Word Tree can be changed when you click on this item. A drop down menu will appear. If you click on Reverse (see image below) the text lines show text preceeding the key word or phrase.
- If the text lines are not readable, you can Zoom & Pan i.e. zoom in/out and move the image left, right, up, or down.
Morph River
- Morph River is useful for finding how parts of speech are used relative to their attributes in a passage range.
It looks at original language versions and translations with a Reverse Interlinear for Greek/Hebrew usage.
a) Click on Morph River icon at the bottom of the Passage Analysis window to select Morph River.
b) Change the passage in the Reference Box if necessary.
c) Click and select the Bible version that you want to analyze.
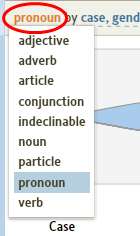
d) Click here to select the Part of Speech that you want to view.
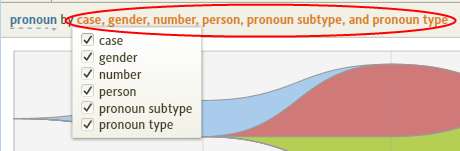
e) Click here to select the attributes for the part of speech you selected above. You can check one or more of these.
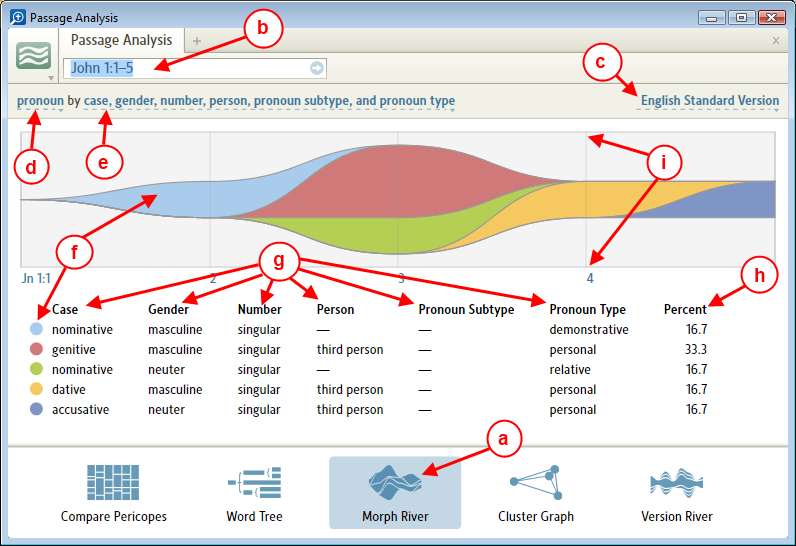
f) In the graphic above there are 5 streams in your river, each with different colors. Also notice to the left of the 1st column that there is a colored dot for each attribute combination. The colored dot identifies the stream that is associated with it in the river.
Hold your mouse over a stream and notice that it changes colors continuously. Also notice that the colored dot for that attribute combination changes colors as the stream changes colors. This helps you identify the attribute combination in the stream.
Hold your mouse over the colored dot next to the attribute combination and the associated stream in the river will change colors.
g) These are the attributes that you selected in step e.
h) This column show the percentage occurrence of the attribute combination for the part of speech in your passage range.
i) The vertical lines in your river graph are verse markers. If you hold your mouse over one of the lines, a pop-up window will appear for that verse.
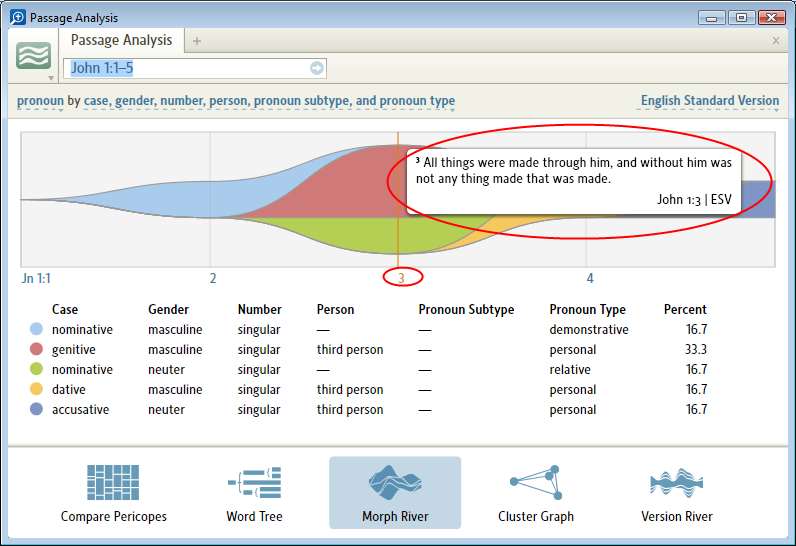
- For help with Parts of Speech and Attributes see the TOC in Glossary of Morpho-Syntactic Database Terminology in your Library.
Cluster Graph
This graph is little understood.
Choose the 2D or 3D display (Windows Only)
- With 2D, the chart shows only how closely the versions maatch based on word usage. Bibles that use similar wording will be clustered closely together; Bibles that use different wording will be spaced farther apart.
- With 3D, the results are interactive. Drag the graph to change the orientation.
- Clicking a Bible label or dot in the graph will open Text Comparison with that Bible listed first.
Logos Help (2022). Faithlife.
Version River
- Version River is useful for seeing the variations between Bible versions graphically relative to a base version that you set up.
a) Click on the Version River icon at the bottom of the Passage Analysis window to select Version River.
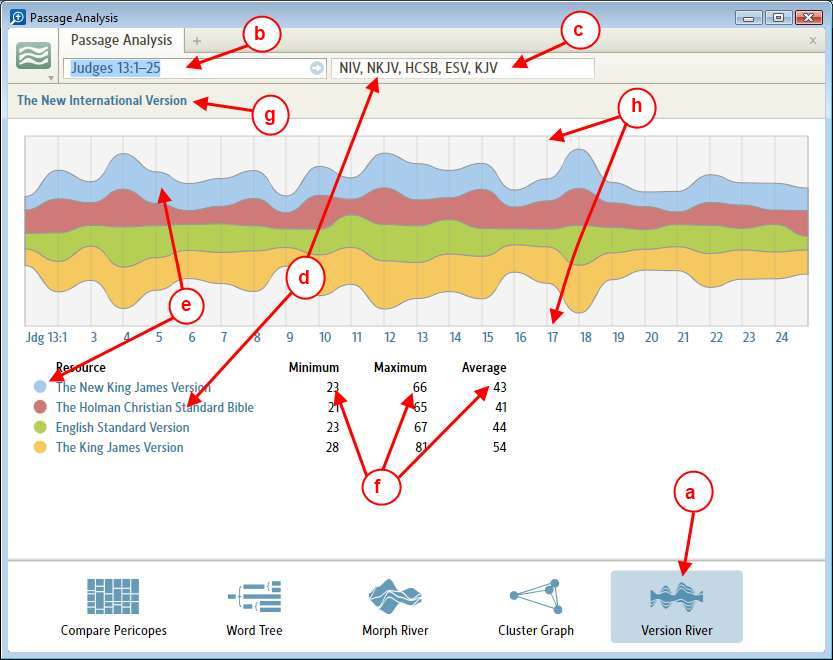
b) Change the passage in the Reference Box if necessary.
c) The first Bible in this box is your base Bible version. Start typing a version abbreviation and a drop down menu will appear from which you can make a selection. To add more Bible versions type a comma and start typing the next version’s abbreviation. You may have to press Enter when you have finished.
d) Your versions from the Bible list appear under the heading Book, except for your base version against which the others are being compared.
e) There are 4 streams in the river, each with a different color, and each has a corresponding dot under the Book heading.
Hold your mouse over a stream and notice that it changes colors continuously. Also notice that the colored dot for that bible changes colors as the stream changes colors. This helps you identify the bible in the stream.
Hold your mouse over the colored dot next to the bible and the associated stream in the river will change colors.
f) The numbers to the right of the bible indicate the difference between this bible and your base version.
g) This link indicates your base version. Click on it to open the Bible.
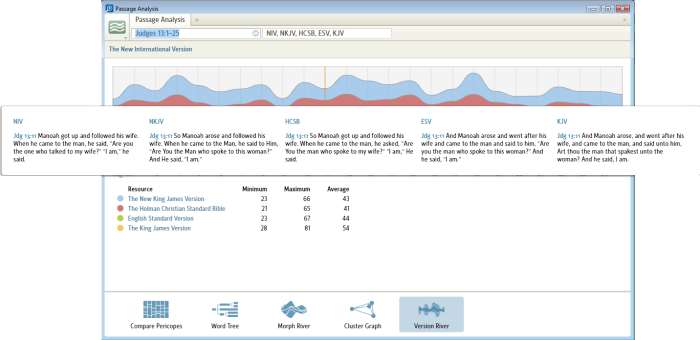
h) The vertical lines in your river graph are verse markers. If you hold your mouse over one of the lines, a pop-up window will appear comparing that verse against all the versions in your Bible list:
Zooming & Panning
- Zooming
- To zoom in or out use your mouse wheel over the view area of your tool. Or from a touch pad use the vertical scroller. The keyboard shortcuts for scrolling do not work here.
Below is a normal view with many text lines:
When zoomed in, see the view below:
- Panning
- Panning is dragging different parts of the graphic into view, usually after Zooming.
- To pan, place your mouse over an empty area of the window and drag until the desired part of the graphic comes into view.