Documents
Updated for Logos 9+
Logos provides several document types to assist/record your research and study, and prepare sermons or material for study groups.
This wiki page will describe the menu and provide a brief description for each of these types.
Links to Logos Support and/or user documentation can be found in the Table of Contents.
Page Contents
The Documents (Docs) menu features a Sidebar and an Information pane.
- You can filter the documents by typing text in the Find box that is part of a document Name or a document Type e.g. visual.
- Then select a number of documents and open the Information pane:
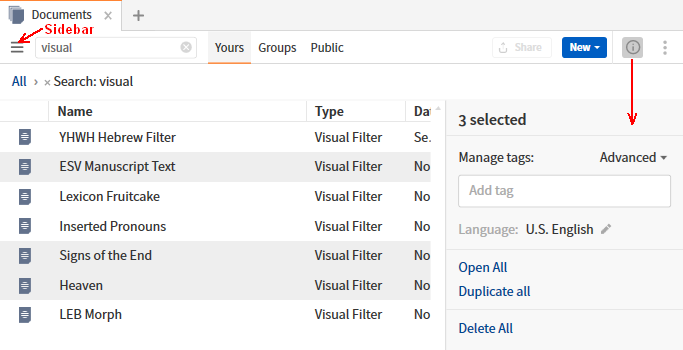
- You can choose to:
- Open all the documents;
- Duplicate all the documents; or
- Delete all the documents.
- You can also Manage tags:
- Add tags; and/or
- use the Advanced drop-down to
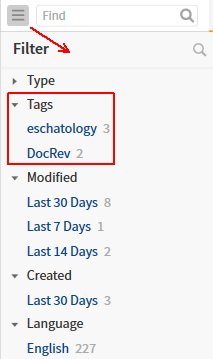
- The tags allow you to identify related documents and they can be tracked via the Sidebar:
- You can provide a Description if a single document is selected.
Bibliography
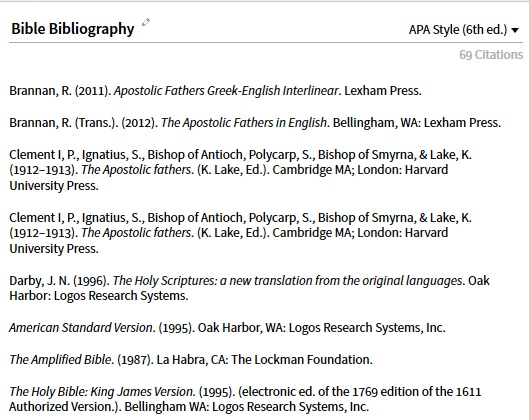 |
A Bibliography is essentially a set of citations that you can append to your study document, thesis, etc.
It is readily created from a number of sources in the Add menu e.g. as you consult or quote from different books add them to a collection from which you can later create the bibliography. |
Canvas
 |
Canvas allows you to visually engage with the bible text. Insert a verse, passage, or pericope, then use the markup tools to highlight, arrange, investigate, and add notes. Break down a passage to show the relationship between clauses, and draw lines and other shapes to indicate the level of connection.
Bible text inserted into a Canvas retains its connection with all of Logos’ sophisticated data tagging, which you can draw on to create rich info cards to document your research on words, topics, and more. |
Clippings
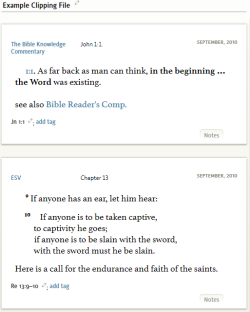 |
Clippings in Logos are similar to a group of index cards that you would use when researching a topic. In each of these index cards you can copy text from other books in your Logos library and paste them there. Logos will automatically add bibliographic info. You may also add your own notes to each clipping card.
You would probably want to name or tag your Clipping appropriate to your research topic as this will help you locate it via the sidebar. |
Morph Query
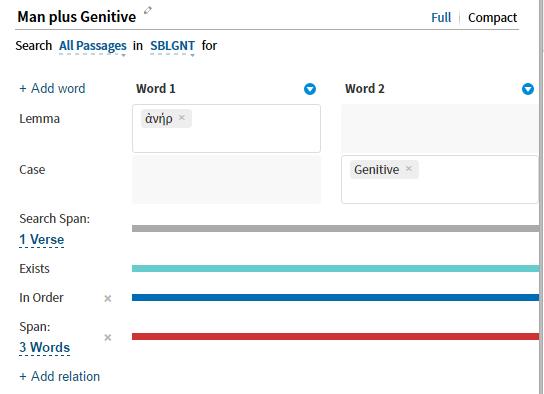 |
A Morph Query is an online graphical query editor that allows powerful searches of Greek and Hebrew resources – some that can’t be accomplished by the text based Morph Search. |
Passage List
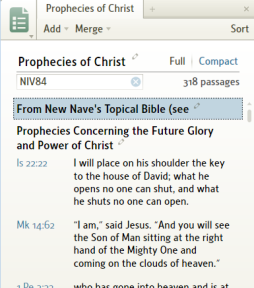 |
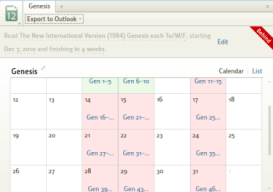
A Passage List is a group of scripture passages and each document allows you to easily add passages from a number of sources. A Passage List can also be created from a Search and from the results of Guides and Tools.
In Passage Lists you can view multiple Bible translations for each of your verses. You can add Headings inside a Passage list to help you remember what each grouping of verses refers to. |
Prayer List
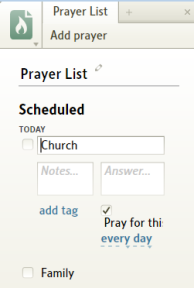 |
A Prayer List is a group of prayers that you want to schedule, access and pray for. And you can record their status. |
Reading Plans
 |
This feature allows you to create a plan(s) to read through one or more of your books. Most can be built from a template, but you can also create Custom plans. They can be followed through Cards on the Home page or a Viual Filter in the book’s toolbar. |
Sentence Diagram
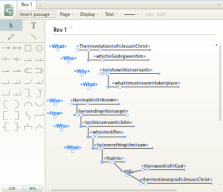 |
A Sentence Diagram is a graphical tool that you can use for Arcing or modelling the structure of sentences, or use for other purposes. |
Sermon Editor
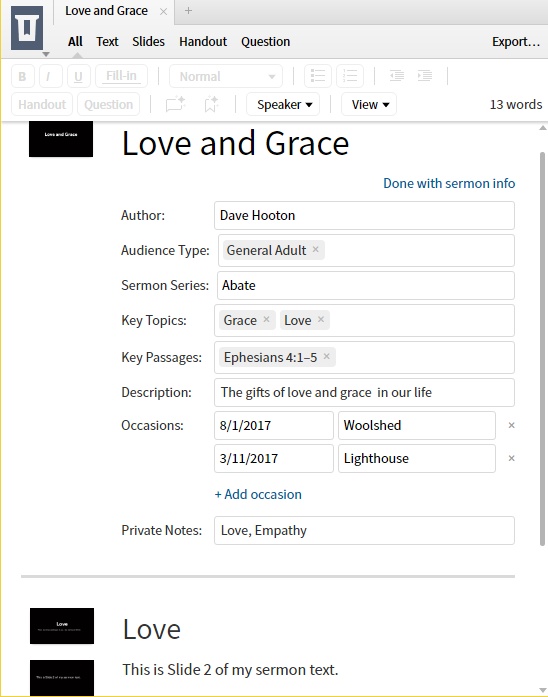 |
This document defines a set of document-like artifacts that cluster around a sermon/presentation given during a church service. The main artifact is the text of the sermon but it can be supplemnted with slides, handouts and questions. |
Syntax Search
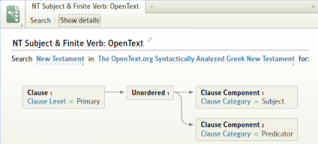 |
Syntax Search is a powerful graphical tool that allows you to setup search criteria for a syntax in a Bible. It is based on grammatical structures like sentence, clause, and phrase so its results better reflect context than a text Search. |
Visual Filter
 |
A Visual Filter allows you to specify Search rules for automatically highlighting text in a specific resource(s). So you can save any text Search as a Visual Filter. Then you can use the resource’s “Visual filters” icon to switch the filter on/off. |
Word Find Puzzle
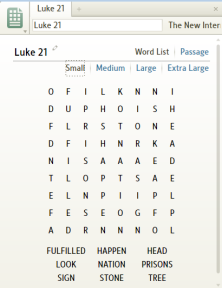 |
A Word Find Puzzle is a fun tool which allows you to build a Word puzzle relative to a specific scripture range which you select. You can use it inside of Logos or you can print it for use as a handout. |
Word List
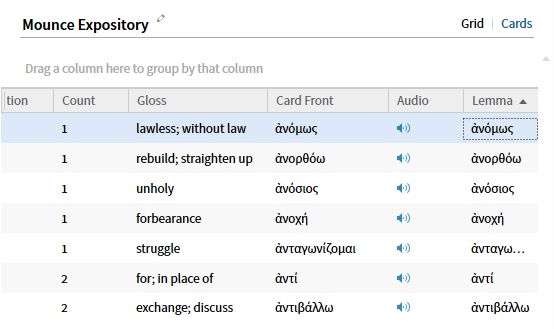 |
A Word List is a list of original language words (lemmas) that can be useful in learning the language. They can be printed as Flash Cards. It is readily created from a number of sources in the Add menu, or an existing list could be merged with another. |
Document Sharing
You can share Logos documents with Faithlife groups. There are two ways to share:
- “Publish” a document to let others get their own copy; you won’t see their changes.
- “Collaborate” on a document to work on it with everyone in a group; everyone’s changes will appear when the document is sync’d.
You can’t share documents directly to another user; rather, you can share documents with any Faithlife group that you are part of, including a built-in group called “All Users”.
Share with Everyone
Consider sharing the document to all Logos users, since it will save you the steps of finding and joining a group, or creating a new group and inviting your friends to join.
- In Logos, open the Documents menu and select a document.
- Choose Share from the toolbar at the top.
- A popup window will appear.
- Click on Public.
This makes the document available to “All Users” via the Public heading in the Documents menu.
Make a Group to Share With
If you want to keep sharing within the confines of a group, you’ll need to make a Faithlife group and invite your friends, who can then download (“connect to”) the document from within the group. On Faithlife you can make public groups that anyone can find, private groups that require users to ask to join and you let them in, or secret groups that are by direct invitation only. Choose the appropriate security level for the group when you create it.
- Go to faithlife.com. Sign in with your Logos/Faithlife account.
- Make a new group by pressing the “+” in the “Groups” section on the left side of the screen. Or jump straight there with this link: https://faithlife.com/groups/new
- Follow the instructions there to make a public, private, or secret group.
- Invite the people you want to share documents with to the group. You can invite them by Logos/Faithlife account, or by email address if you know it.
Now the group exists, and once people accept your invitation, they can connect to any documents you’ve shared with that group.
Share with a Group
- In Logos, open the Documents menu and select a document.
- Choose Share from the toolbar at the top.
- A popup window will appear.
- Click on Group.
- A group picker will appear.
- Choose the entry for the group you want to share with.
Connecting to Shared Documents
Once you’ve got a group and you’ve successfully shared a document to a group, other group members (or any Logos user, if you shared to “All Users”) can go and “connect” to the shared document so that it will show up in their Logos.
(Recommended)
- In Logos, open the Documents menu
- Select Groups or Public from the toolbar
- for Groups:
- use the sidebar to select the group
- use the sidebar to narrow the choice of documents
- choose a documnet
- for Public:
- use the sidebar to narrow the choice of documents
- choose a documnet
Group shared from Faithlife.com
(Indirect)
- Go to faithlife.com, and find the group (in the left-hand navigation list under “Groups”) the doc was shared to.
- Once on the group’s page, choose the “Logos Documents” page from the left navigation.
- This shows a list of Logos documents shared with the group.
- Find the document you want to get and press the blue button next to it. (This button may say “Connect” or “Actions” with a drop-down menu, where you choose “Connect”.)
- For published documents, this puts a copy in your account at the server. For collaborated documents, this joins you to the collaboration.
- Now, back in Logos, once sync happens, the document is downloaded from the server onto your Logos, and you can use it as normal.
Send Links for Public shared
(Indirect)
It’s sometimes nice to alert people that a document is ready for them to go and get.
- Go to https://documents.logos.com and find the document you want to mail a link to.
- Click on the document’s title. This will open a detail page for that document.
- Copy the URL from your web browser’s address line. It will look something like this: https://documents.logos.com/documents/3224453529c449e69b4a4bcf5df09fbd
- Recipients can follow that link to land on that detail page. If they are authorized to connect to the document (either because it’s shared to “All Users” and they’re logged in, or because it’s shared to a Faithlife group that they are connected to) they will see a blue “Actions” button in the upper right, where they can choose to connect to the document. Then, back in Logos, once sync happens, it will be there in the Document menu for them to use as normal.