Print/Export
Updated for Logos 10+
Page Contents
What is Print/Export?
This feature allows you to print and/or export sections of resources and the output of many tools in Logos, similar to a document processor.
It opens as a floating window and has various options for printing, exporting and previewing its output.
How to open Print/Export
- You can print most of the items from: resources, tools, documents, etc
and the method for opening the Print/Export window is the same.
- Open the Panel menu of the resource.
- In the drop down menu, click on Print/Export.
- The Print window will open.
Logos will only allow one Print/Export window to be open at a time.
Using keyboard shortcut
- Click in the resource that you want to print from.
- On your keyboard use the keyboard shortcut Ctrl+P/Cmd+P to open the Print/Export window.
Selecting what to print
- There are a few ways to determine what will be printed, depending on the resource or tool type.
- So this wiki subTopic is broken up into 3 minor Topics to try and cover these situations.
- These may not be fully inclusive of all resources or tools. But in these examples you can see
what you might expect in the Print Preview window when trying to determine what will be printed.
- Note that Favorites and Copy Bible Verses do not have a Print/Export option, and some other tools are Export only.
- When printing from a Guide you will need to expand/open the individual sections headings that you want to be printed.
- If you have the Print/Export window open and then change the Guide view,
use the keyboard shortcut Ctrl+P to update the Print window.
- When printing Notes or Clippings, Logos does not permit printing individual notes or clippings.
- When printing a Passage List and you have multiple Bibles selected, Logos will print it vertically or horizontally
depending on how it is showing on your screen, so adjust your Passage List window for the view you want.
From text resources
- Choose what you want printed:
- you can select text; or
- you can filter the resource e.g. from a Passage List; or
- just locate the section you want.
- Open the Print/Export window.
- When the Print window appears, notice that one of Use selected text, Use filtered text or Use these sections is chosen,
and you see the text in the preview area.
- Depending on your resource type you may see a scripture reference, a word or a page number that indicates the active reference.
You can click in the box to change the range:
- Page numbers must be consecutive e.g. Page 544-546.
Be aware that the number of pages that you select may be different than the number of pages printed (look under the preview page for the number of pages to be printed). - Enter a scripture reference range like you would in your Bible resource e.g. Mt 6:1-8.
- After editing in the box, click on the blue arrow to update the preview page.
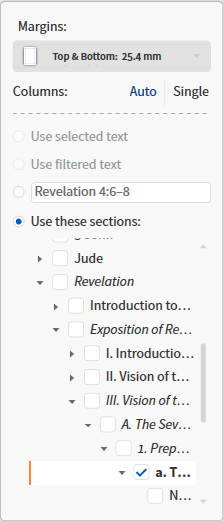
- You can choose Use these sections to customize what will be included in your printed page(s).
The items that appear here are what you would see in the Table of Contents for the resource that you are printing from.
Be aware that not all Bibles (or other resources) show every heading.
- Instead of checking every subsection, you can right click on a heading that you want printed and choose Select all (or Clear all).
- Finally, choose whether you want to print in Columns:
- Single is the default
- Auto will select the best choice for number of columns; usually 2.
- The preview page will update when you make a choice.
- Many Logos tools and some resources may give you a more limited set of options for selecting what you want to print.
- Some tools where this may happen: Guides, Information, Cited By, Power Lookup, Workflows.
- Open the Print/Export window after you have run the tool:
- Select the output format that you want and then view it in the preview page.
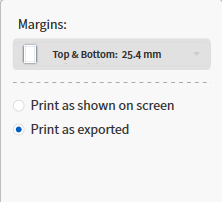
- Print as shown on screen is the first Print option.
- Print as exported is the alternative Print option,
the preview page shows the single format for the Export methods.
- Collections provides output formats that apply to both Print and Export.
- When opening the Print/Export window for some tools or resources you may notice that there are no print selection options.
- Some examples where this might happen: Search, Factbook, Atlas, Highlighting, Text Comparison, Explorer, Notes.
- Open the Print/Export window after you have run the tool:
- Notice there are no print selections available. If you find that your preview page is insufficient, then:
- Try using the Export method(s) along with a word processor or a browser.
- Or bypass using the Print window and use Copy/Paste from your resource into a word processor.
Print Preview
- Logos provides a condensed view and a zoomed view to preview your document.
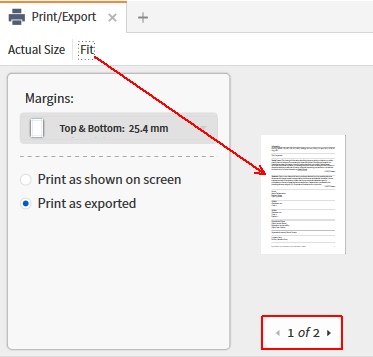
- The default view is Fit but you can zoom in to Actual Size to get a better idea of how your document will look before printing:
- Notice that the cursor changes to an open hand when over the document.
Use this to drag the zoomed document into position for viewing.
- Notice the page number under the document preview.
This shows you the number of printed pages that you can expect.
- You can click on the arrows to change the preview page of the document.
- Or you can use the arrows on your keyboard to change the preview page.
- You can scale the size of text in the Print window, but it will not effect the actual size of text in the document:
- Open the Print window’s Panel menu.
- Use the slider to adjust the window’s text size.
Setting up the printed page
- You will want to setup how you want your document printed before you actually print your page.
Font Size
- To change the size of text for your document within your print preview window you need to change
the size of text for the resource/tool prior to opening the Print/Export window.
- Open the Panel menu of the resource/tool.
- In the drop down menu, adjust the text size slider to get the required text size.
- Then click on Print/Export in the menu.
Print options
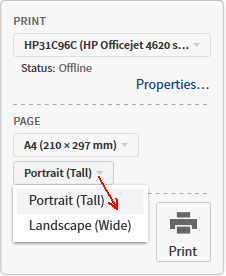
- Select the Printer that you want to use as the other print settings may vary:
- Click on the current printer name.
- A drop down list of printers for your computer will appear.
- Select the printer that you want to use.
- Set the paper size:
- Click on the arrow next to the Paper size (the default is Letter).
- A drop down menu of available paper sizes for your printer will appear.
- Select your desired paper size.
- Set the page orientation:
- Click on the arrow next to the Portrait/Landscape selector (default is Portrait).
- Select the page orientation that you want.
- Set Printer Properties:
- Click on the Properties.. link.
- This will allow you to change the Properties in the same way as with other document printing software.
Possible options are very dependent on the printer e.g.
- No. of copies
- Two-sided printing
- Black & White / Color
- Paper type
- When you are done, press the OK button to set these properties.
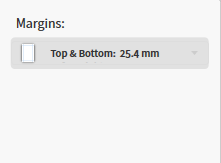
Page Margins
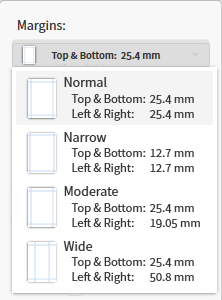
- Click on the arrow next to the Margins: selector.
- A drop down menu will appear with some margin choices.
- Select the margins that you want for your document.
Exporting
Logos has embedded this feature in its Print/Export window. It allows you to export whatever you could send
to the printer to the clipboard, or selected document processors.
Note that some tools allow export only e.g. Library, Concordance.
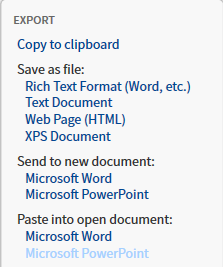
Copy to clipboard
- You can export your document to the windows Clipboard for pasting into Word, Excel, PowerPoint or some other editing software.
- Option is similar to Paste into open document (below) except for Citation.
- check your Footnote and Citation options in the Program Settings tool.
Rich Text Format
- You can export your document to a RTF file.
- This file type supports text with font styles, sizing and other attributes. It also supports embedded charts, but not pictures.
- This is useful when you want to open it with a word processor (e.g. Microsoft Word) and edit it. Other software tools also may import RTF files.
Text Document
- You can export text documents to a *.txt* file. You can open or edit these files with Microsoft NotePad or a similar text based editor.
- You will not find graphic items in a text file.
Web Page (HTML)
- You can export your document to a web page on your computer.
Then use your browser to open that web page using Open File from the browser’s menu, or a double-click on the file.
- This sometimes can be useful when printing from a browser works better than printing from Logos.
- This can also be useful when you want to create web based pages for a study that you want to share with others.
XPS Document (Windows only)
- This file type works well with Windows 8 and newer.
- When saving in this file type, you can use Internet Explorer to open the document.
- This format will show your highlighting and other markups.
- Your browser may print this document more to your liking.
Send to new document:
- This will open a new instance of software like MS Word, Excel and PowerPoint and allow you to Save it.
Paste into open document:
- This will paste into an open instance of software like MS Word, Excel and PowerPoint.
- Make sure the mouse cursor is at the correct location.
“Print” to PDF (Windows)
- Where you have a Print option you can select a PDF Printer and the document will be saved to a PDF file.